
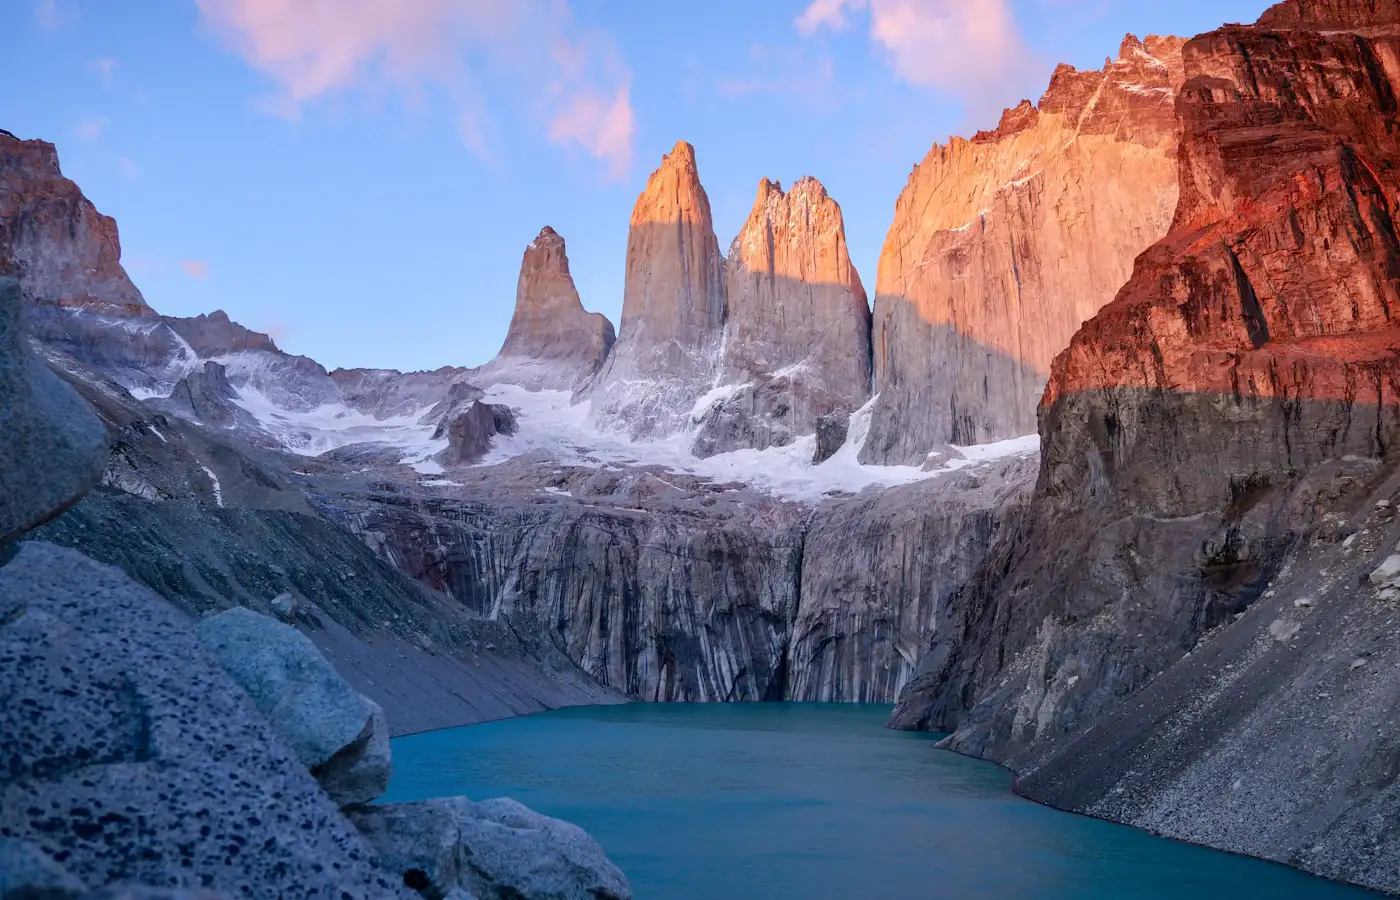
I still remember the exact moment the bus rounded a bend on Ruta 9 and the three granite towers of Torres del Paine punched up out of the Patagonian steppe like they were daring me to keep driving past them. I didn’t. I’d been living out of a van for the better part of two years by that point, chasing empty roads from Alaska down through Central America, and I thought I’d seen dramatic landscapes. Patagonia humbled me in about four seconds flat. If you’re reading this, you’re probably standing exactly where I was a few years ago — scrolling through photos of impossibly blue glacial lakes and granite spires, wondering how on earth you actually get yourself there, what order to see things in, and whether you need a 4×4 or can get away with buses. I’ve now done this trip three times, once solo, once with my partner, and once guiding a friend who’d never camped in her life, so I’ve made pretty much every mistake there is to make. This is the guide I wish someone had handed me before that first trip.
Torres del Paine National Park sits in the far south of Chile, in the Magallanes region, and it is without question one of the most spectacular hiking and road-tripping destinations on the planet. This post is going to walk you through everything: which airport to fly into, how to get from that airport into the park, whether you need a rental car, the exact sequence of stops and viewpoints that makes the most sense logistically, where to sleep, what to eat, and the practical bookings you’ll want to lock in months in advance because this park does not mess around with capacity limits.
Before we get into logistics, let me set the scene a bit more, because I think it actually matters for how you plan this trip. Torres del Paine is a UNESCO Biosphere Reserve, and it’s shaped by a genuinely unusual combination of landscapes packed into a relatively compact area: the Southern Patagonian Ice Field feeding glaciers that calve directly into turquoise lakes, wind-scoured steppe grassland dotted with wild guanaco herds, dense southern beech (lenga and ñire) forests, and, rising above all of it, that famous trio of granite towers that give the park its name. It’s the kind of place where the landscape itself changes character every few kilometers, which is part of why the multi-day trekking routes here are so rewarding — you’re not looking at variations on the same view for days on end, you’re moving through genuinely distinct ecosystems and geological formations.
Quick Trip Snapshot
- Best arrival airport: Punta Arenas (PUQ) — Arturo Merino Benítez isn’t the one you want, that’s just your connection through Santiago.
- Gateway town: Puerto Natales, about 3.5 hours by bus or car from Punta Arenas.
- Best time to go: November through March (Southern Hemisphere spring/summer), with December–February being peak season, and shoulder months (Nov and March) offering fewer crowds and still-solid weather.
- Ideal trip length: 5–7 days minimum if you want to do the W Trek plus a couple of driving days; 10+ days if you want to add El Chaltén across the border in Argentina.
- Transport verdict: a rental car (ideally an SUV or small 4×4) is genuinely the best way to see the park if you’re not backpacking the full multi-day trek, but buses and shuttles are entirely workable if you’re trekking or on a budget.
Getting There: Which Airport to Fly Into
This trips people up constantly because Patagonia feels remote, so travelers assume they need to fly into some tiny regional strip. You don’t. The airport you want is Presidente Carlos Ibáñez del Campo International Airport (PUQ) in Punta Arenas, on the Strait of Magellan. It’s the main gateway to Chilean Patagonia and it’s served daily by LATAM Airlines and Sky Airline, both of which fly direct from Santiago’s Arturo Merino Benítez International Airport (SCL), which is where nearly everyone’s international flight into Chile will land first.
So the actual routing for most international travelers looks like: fly into Santiago (SCL), then take a domestic connection south to Punta Arenas (PUQ). That domestic leg is about 3.5 hours and honestly one of the more scenic flights I’ve taken — you get a preview of the Andes and the fjords from 35,000 feet before you’ve even touched ground. Book that connecting flight as early as you can, especially if you’re traveling December through February, because seats fill up and prices climb fast in high season.
An alternative some travelers use is flying into El Calafate, Argentina (FTE) if you’re combining Torres del Paine with Argentine Patagonia (El Chaltén, Perito Moreno Glacier) on the same trip, then crossing the border overland into Chile via Puerto Natales. I’ll touch on that combined-trip logic later in this post, but if Torres del Paine is your primary or only Patagonia stop, Punta Arenas is your airport, full stop.
From Punta Arenas Airport to Puerto Natales
Once you land in Punta Arenas, you have three realistic options to get to Puerto Natales, the small town that functions as basecamp for the entire park:
- Rent a car at the airport. This is what I’d recommend if your budget allows it. Companies like Hertz, Europcar, and local operator EMSA Rent a Car all have desks right at PUQ. The drive north on Ruta 9 takes about 3 to 3.5 hours and is flat, well-paved, and honestly a gorgeous introduction to the Patagonian steppe — you’ll likely spot guanacos, rheas (ñandúes), and maybe your first glimpse of condors before you even reach town.
- Book a direct shuttle/bus. Bus Sur and Bus Fernández both run direct coach services from the Punta Arenas airport straight through to Puerto Natales, no need to go into the city center first. These run several times daily in high season and cost a fraction of a rental car. Check current schedules on Bus Fernández or via Rome2rio for the latest comparison of operators and times.
- Pre-arranged transfer. Some hotels and hostels in Puerto Natales or even inside the park will arrange a private transfer for you, which is pricier but convenient if you’re arriving late or with a lot of gear.
Do You Need a Rental Car? The Honest Answer
This is probably the single most common question I get asked about this trip, and the honest answer is: it depends entirely on what kind of Torres del Paine trip you’re doing.
If you’re doing the W Trek or O Circuit (multi-day backpacking): You don’t need a car at all, and honestly it becomes a liability since you’ll have to pay to park it or leave it in Puerto Natales for days while you’re on trail. Buses run from Puerto Natales directly to the park entrances and to the boat docks that connect the trekking circuit. Companies like Bus Gómez and Bus Fernández run multiple daily departures timed around the trekking logistics.
If you’re road-tripping and doing day hikes rather than a multi-day trek: A rental car, ideally something with decent ground clearance, is genuinely the better call. The park is enormous — bigger than a lot of visitors expect — and the viewpoints, trailheads, and lookouts are spread across a road network that public transport simply doesn’t service well. Having your own vehicle means you can chase the light for photography (this matters more than you’d think — the towers only “light up” pink and orange for about twenty minutes at sunrise), adjust your plans around weather (which changes fast and often here), and hit the quieter viewpoints most bus-bound tourists skip entirely.
My honest recommendation, and what I did on my second trip with my partner: rent a car in Punta Arenas, use it to explore the eastern and southern sections of the park (Laguna Amarga, Salto Grande, Lago Pehoé viewpoints, Mirador Cuernos), then park it at one of the estancias or in Puerto Natales and do a shorter 2-3 day version of the W Trek on foot from there. Best of both worlds.
One important caveat: most standard rental agreements from Punta Arenas restrict crossing into Argentina without extra paperwork and insurance documents. If you’re planning to continue on to El Calafate or El Chaltén, tell the rental company upfront — they’ll issue the international driving permit paperwork for an extra fee, but you must arrange it before you leave the counter.
When to Go
Patagonia has a short, intense high season. Here’s how I’d break it down:
- December–February (peak summer): Warmest temperatures (highs around 15-20°C / 59-68°F), longest daylight (up to 17 hours of light), but also the busiest trails, fullest campsites, and highest prices. Book refugios and campsites 4-6 months ahead.
- November and March (shoulder season): My personal favorite window. Fewer crowds, still-good weather, and the added bonus of autumn colors on the lenga trees in March — the whole valley turns orange and red, and it’s genuinely stunning against the granite.
- April–September (winter/off-season): Many refugios close, wind and snow make trekking harder, but if you’re just road-tripping and doing shorter walks with a proper 4×4, you’ll have the park almost entirely to yourself. Not for everyone, but if you’ve got real cold-weather experience, it’s magic.
Whatever month you go, pack for four seasons in one day. Patagonian wind is a genuine force to be reckoned with — gusts regularly hit 60-100 km/h in the exposed sections, and I’ve watched grown adults get physically knocked off balance on the trail up to the base of the towers. A proper waterproof, windproof shell is not optional gear here, it’s survival gear.
The Step-by-Step Itinerary: How to See Torres del Paine in the Right Order
Here’s the sequence I’ve refined over three trips, designed to work whether you’re driving, busing, or trekking. I’m laying this out as a 6-day itinerary based from Puerto Natales, which is the version I most often recommend to first-timers, with notes on how to compress it if you have less time or expand it into the full W Trek.
Day 1: Arrive in Puerto Natales, Get Organized
Fly into Punta Arenas, transfer to Puerto Natales (by car or bus as above), and spend the afternoon getting your bearings and your logistics sorted. This town is small but has everything you need: gear rental shops, grocery stores for trail food, and the park’s info offices.
- Check in at your accommodation. I’ve stayed at both The Singular Patagonia (a splurge, but the converted 1915 sheep-processing plant turned luxury hotel is worth it for one night) and cheaper hostels like Erratic Rock, which is also a fantastic source of the famous free 3pm trip-planning talk they run daily for W Trek hikers.
- Stop by an outdoor gear shop if you need to rent trekking poles, a sleeping bag liner, or gas canisters — several shops line Bulnes and Eberhard streets in town.
- Stock up on trail snacks and any specialty food at the local supermarket (Unimarc has a location in town) since prices inside the park at the refugio shops are notably higher.
- Have dinner at Afrigonia, a genuinely wonderful fusion restaurant blending African and Patagonian flavors that’s become something of a local legend, or the more classic Santolla for king crab (centolla), a Patagonian specialty you absolutely have to try while you’re this far south.
Day 2: Enter the Park, Laguna Amarga and the Eastern Viewpoints
This is where the trip really begins. Whether you’re driving your rental or catching an early bus (they leave Puerto Natales around 7-7:30am), you’ll head north on Route 9 and then Y-150 into the park.
- Stop at the Laguna Amarga entrance to pay your park entrance fee and pick up your ticket, which you should have pre-booked online through the official Sistema de Reservas de Parques Nacionales de Chile portal — Torres del Paine now requires advance online booking for park entry, and this catches a lot of travelers off guard. Do this weeks ahead of your trip.
- Drive or hike to Mirador Laguna Amarga, a short, easy stop with your first proper photo of the towers reflected in a turquoise lagoon, framed by grazing guanacos.
- Head to Salto Grande, a thunderous waterfall connecting Lago Nordenskjöld and Lago Pehoé, an easy 15-minute walk from the parking area and one of the most rewarding short stops in the entire park.
- Continue to Mirador Cuernos, just a bit further along, for a jaw-dropping view of the horn-shaped Cuernos del Paine towers rising over the lake.
- If you have energy left and started early, this is the day to begin the hike up the Valle Ascencio toward Base de las Torres, staying overnight at Refugio El Chileno or Campamento Torres to catch sunrise at the towers the next morning (more on that below).
Day 3: Base de las Torres — the Signature Hike
If you didn’t start the hike the day before, today is the day to do the single most iconic hike in the park: the trek up to the base of the three towers themselves.
- Start from the trailhead near Hotel Las Torres or Refugio El Chileno, depending on where you’re staying.
- The full round trip is roughly 18-19 km (11-12 miles) and takes 7-9 hours depending on your pace and how much time you spend at the top.
- The final hour is a steep boulder scramble that levels the playing field for everyone — no amount of fitness makes those last switchbacks easy, but the reward is standing at a glacial lake staring directly up at the three granite towers, which honestly might be the most impressive single view I’ve had on any trek anywhere in the world.
- If you can manage it, stay overnight at Refugio El Chileno or camp at Campamento Torres the night before and do the final push before sunrise — the towers catch the first light in a deep orange-pink glow that only lasts a few minutes but is unforgettable. Book refugio beds well in advance via Hotel Las Torres or Vertice Patagonia, which manages several of the park’s refugios.
Day 4: Lago Pehoé, Valle Francés, and the Western Section
Whether you’re continuing the W Trek westward or driving around, today’s focus is the middle and western sections of the park.
- Take the catamaran across Lago Pehoé from Pudeto to Paine Grande if you’re trekking the W (this boat crossing is one of the most scenic 30-minute rides you’ll ever take, and it’s how most W trekkers get from the eastern to central sections of the park). Book tickets ahead through Hielos Patagónicos, who operate the official catamaran.
- If you’re driving, the road loops around to the Pudeto and Lago Grey areas, giving you road access to some incredible viewpoints without the boat.
- Hike into Valle Francés (French Valley) for views of hanging glaciers calving off the Paine Grande massif — you’ll hear the ice cracking and crashing before you see it, which is a genuinely spine-tingling experience. The full valley hike to Mirador Británico and back is a long day (about 22 km round trip from Paine Grande), but even the shorter version to Mirador Francés is spectacular and much more manageable.
- Overnight at Refugio Paine Grande or Campamento Italiano if trekking, or head back to a hotel near Lago Grey if driving.
Day 5: Glacier Grey
The final major stop on the classic W Trek route, and one of my personal favorites because it feels genuinely different from the granite-and-lake scenery of the rest of the park.
- Hike from Refugio Paine Grande to Refugio Grey, roughly 11 km one way, tracing the shoreline of Lago Grey.
- The trail rewards you with increasingly close views of Glacier Grey, a massive tongue of ice calving directly into the lake, often with electric-blue icebergs drifting past.
- For a genuinely unforgettable add-on, book a boat tour that gets you up close to the glacier face, or even a guided ice-trekking experience on the glacier itself, through GetYourGuide or Viator, both of which list several operators running Grey Glacier boat and ice-hiking excursions.
- If you’re driving rather than trekking the full W, you can reach a view of Glacier Grey via a shorter trail from the Lago Grey campground/hotel area — a good half-day option if you don’t have time for the full multi-day trek.
Day 6: Exit the Park, Return to Puerto Natales or Punta Arenas
Whether you finish the trek at Paine Grande (catching the catamaran back to Pudeto and a bus to Puerto Natales) or drive out via the southern park roads, today is your travel day back to civilization.
- If you have time before your onward flight, stop at Cueva del Milodón, a genuinely fascinating cave just outside Puerto Natales where the remains of a giant prehistoric ground sloth were discovered — it’s a quick, easy stop that adds a totally different flavor to the trip.
- Grab a final dinner in Puerto Natales — I always end these trips at a parrilla for Patagonian lamb, slow-roasted on an open cross fire, which is the definitive regional dish.
- Transfer back to Punta Arenas the next morning for your flight out.
Gear Rental in Puerto Natales
One thing that makes flying into Patagonia from far away so much easier than it used to be is how good the gear rental scene has become in Puerto Natales. You genuinely don’t need to fly in with a full backpacking kit.
- Tents, sleeping bags, and sleeping pads can be rented from multiple shops along Eberhard and Bulnes streets, or booked as add-ons directly through Vertice Patagonia or Fantástico Sur when you reserve your campsite.
- Trekking poles and gaiters are cheap to rent and worth grabbing even if you don’t own your own, especially for the steep final push to Base de las Torres.
- Camping stoves and gas canisters are available locally — note that you cannot fly with gas canisters, so this is one item you’ll always need to source once you land, not bring from home.
- Full-service outfitters can kit you out head-to-toe with rental boots, packs, and rain gear if you’re traveling light and don’t want to check bags full of trekking equipment for what might be a once-in-a-lifetime trip.
I’ve rented gear here twice now and never had an issue — the shops are used to serving trekkers from all over the world and the equipment is generally well-maintained given how much use it gets during the short high season.
Extending Your Trip Beyond Torres del Paine
If you have extra time built into your itinerary, a few worthwhile add-ons from this part of Chile:
- Ushuaia and Tierra del Fuego — the “End of the World” city is a further flight south from Punta Arenas or reachable overland, and it’s the jumping-off point for Antarctica cruises if that’s ever on your radar.
- Marble Caves (Capillas de Mármol) near Puerto Río Tranquilo, further north up the Carretera Austral — a stunning, very different Patagonian landscape of swirling blue-and-white marble caverns accessible by boat tour, though it requires a multi-day detour to reach.
- El Chaltén and El Calafate, Argentina — as mentioned, an easy overland connection from Puerto Natales that rounds out a full Patagonia circuit covering both countries’ signature landscapes.
Where to Stay
Accommodation inside the park ranges from basic campsites to genuinely luxurious lodges, and it’s worth understanding the tiers:
- Campsites: The cheapest option, run by either Vertice Patagonia or Fantástico Sur depending on location. Some require you to bring your own gear, others offer full-equipment rentals (tent, sleeping bag, pad) on-site, which is a fantastic option if you’re flying in and don’t want to carry camping gear across continents.
- Refugios (mountain huts): Dorm-style beds with meals included, a good middle-ground option that lets you trek without carrying food or a tent. Refugio El Chileno, Refugio Los Cuernos, Refugio Paine Grande, and Refugio Grey are the main ones along the W.
- Hotels/lodges: For those who want comfort after a day of hiking, options like Hotel Las Torres, Tierra Patagonia, and Explora Patagonia offer genuinely gorgeous rooms with towering views, private transfers, and guided excursions built in.
Whatever tier you choose, book early. This cannot be overstated: Torres del Paine refugios and campsites for December through February routinely sell out 4-6 months in advance, and unlike a lot of destinations, you genuinely cannot just show up and wing it here — the park operates a controlled reservation system precisely because of how much foot traffic it gets and how fragile the ecosystem is.
Combining Torres del Paine with El Chaltén, Argentina
If you have 10+ days, it’s absolutely worth combining this trip with a crossing into Argentine Patagonia. From Puerto Natales, buses run to El Calafate (for Perito Moreno Glacier) and onward to El Chaltén (Argentina’s trekking capital, home to Mount Fitz Roy). The border crossing at Cerro Castillo/Cancha Carrera is straightforward, and companies like Turismo Zaahj and Bus Sur run this route regularly. I’ll be covering El Chaltén in its own dedicated post, since it deserves the same level of detail as Torres del Paine.
Navigating the Park: Road Names and Junctions
One thing that confused me on my first trip was the way Chilean park roads are signed, so let me spell out the actual navigation logic in case you’re driving yourself.
- From Puerto Natales, you’ll head north on Ruta 9 toward the town of Cerro Castillo, then turn onto the park access road, which eventually splits into a rough loop connecting all the major eastern and central sections of the park.
- The Laguna Amarga entrance station is your first stop for ticket validation no matter which direction you approach from — don’t skip it even if you think you’ve already paid online, since they need to scan you in.
- From Laguna Amarga, the road forks: one branch heads toward Hotel Las Torres and the Base de las Torres trailhead, the other continues west toward Pudeto (the catamaran dock for Lago Pehoé) and onward to the Lago Grey sector.
- A separate southern route connects back toward the Serrano and Lago Sarmiento areas, which most visitors skip but which offer quieter, equally beautiful views if you have extra time.
- Mobile signal is patchy to nonexistent through much of the park, so download offline maps (Maps.me or a downloaded Google Maps region) before you leave Puerto Natales, and pick up a physical trail map from the park entrance as a backup — I’ve relied on mine more than once when signal dropped entirely.
- Distances inside the park are longer than they look on a map because of gravel sections and speed limits (typically 40-60 km/h on unpaved stretches) — budget more driving time than a quick glance at the map might suggest, especially if you’re chasing a specific sunrise or sunset window.
Practical Tips I Wish I’d Known Sooner
- Book your park entrance ticket online in advance through the official Chilean national parks reservation system — walk-up entry is no longer guaranteed.
- Bring cash. Some refugios and smaller operators inside the park don’t reliably accept cards, and ATMs are limited once you’re out of Puerto Natales.
- Layer aggressively. I wear a base layer, fleece, and hardshell year-round here, even in “summer,” because the wind chill is brutal on exposed ridgelines.
- Refill water from the streams. Patagonia’s glacial meltwater is some of the cleanest drinking water on earth — I never carried more than a liter at a time and just refilled constantly from clear-running streams.
- Respect the fire ban. A devastating fire in 2011-2012, caused by an unattended camping stove, burned roughly a fifth of the park. Cook only in designated areas and never leave a stove unattended.
- Get travel insurance that covers trekking at altitude and remote evacuation. This is genuinely remote country, and if something goes wrong on the trail, help is not five minutes away.
What to Pack for Torres del Paine
I’ve refined my Patagonia packing list over three trips, and the honest truth is that most people either over-pack for cold or under-pack for wind. Here’s what actually earns its place in the bag:
- A genuinely windproof, waterproof hardshell jacket. Not a “water-resistant” city jacket — a real mountaineering-grade shell. I use mine constantly and it’s the single piece of gear I’d never trek here without.
- A warm mid-layer — a fleece or a synthetic puffy, since down loses its insulating power when wet, and Patagonian weather flips from sun to sleet with almost no warning.
- Sturdy, broken-in hiking boots. The terrain around the towers and Valle Francés is rocky and uneven; trail runners work for fit, experienced hikers but I’d default to boots with ankle support for most people.
- Trekking poles. The steep boulder scramble up to Base de las Torres and the descent from Valle Francés are both kinder on the knees with poles.
- A buff or neck gaiter to protect your face from wind-driven dust on the steppe sections.
- Sunglasses with a strap and high-SPF sunscreen — the ozone layer is measurably thinner this far south, and the sun reflecting off glacial lakes and snow is fierce even on cool days.
- A reusable water bottle or bladder rather than bottled water, since you’ll be refilling constantly from clean glacial streams.
- A dry bag or waterproof pack liner for your pack, because rain here doesn’t always announce itself politely.
Budget Breakdown
Torres del Paine can be done on a genuine backpacker budget or as a proper splurge trip, and it’s worth knowing roughly where your money goes so you can plan accordingly.
- Budget trekker (camping, cooking your own food): Expect to budget for park entrance fees, campsite fees (some are free, some charge a modest nightly rate), bus transport from Puerto Natales, and groceries. This is the route most backpackers I’ve met on the trail take, and it’s entirely doable without sacrificing the experience.
- Mid-range (refugios with meals included): Refugio beds with half-board or full-board meals cost significantly more per night than camping but save you from carrying food and cooking gear, which matters if you’re flying in with limited luggage allowance.
- Luxury (lodges and hotels): Properties like Explora, Tierra Patagonia, and The Singular run guided day excursions, gourmet meals, and genuinely stunning rooms, at a price point that reflects it. Worth considering for a portion of your trip even if you’re camping the rest, honestly — I did one splurge night at each end of my second trip and it made a real difference to how rested I felt on trail days.
- Rental car: Factor in daily rental cost plus Chilean fuel prices, which run higher than you might expect this far from a refinery.
Patagonian Food and Culture
One thing that surprised me on my first trip was how good the food is out here, given how remote the region feels. Patagonian cuisine leans heavily on lamb, seafood from the nearby fjords, and hearty, warming dishes built for a cold climate.
- Cordero al palo (spit-roasted lamb): The definitive regional dish, slow-cooked over an open fire for hours until the meat falls off the bone. You’ll see it cooking outside restaurants all over Puerto Natales.
- Centolla (king crab): A Magallanes specialty, usually served simply with lemon and butter to let the sweet, delicate meat speak for itself.
- Calafate berries: A small purple Patagonian berry that shows up in everything from jams to pisco sours here — local legend says anyone who eats one is destined to return to Patagonia, which I can personally vouch for.
- Chilean wine: Even this far south, you’ll find a solid selection of Chilean reds, particularly Carmenère and Cabernet Sauvignon from the Central Valley regions further north, at very reasonable prices.
The region’s culture is shaped heavily by its sheep-ranching (estancia) history — many of the lodges and hotels around the park are converted or inspired by historic estancias, and you’ll often see gauchos (Chilean cowboys) out on horseback tending livestock right up to the edges of the park boundaries.
Photography Tips for Torres del Paine
If you’re bringing a camera, a few things I learned the hard way:
- Sunrise is everything for the towers themselves. The famous pink-orange alpenglow on the granite spires lasts maybe 15-20 minutes right around sunrise, which means camping or staying at Refugio El Chileno or Campamento Torres the night before is genuinely worth it if photography matters to you.
- Bring a polarizing filter if you shoot with a dedicated camera — it makes a huge difference cutting glare off the glacial lakes and deepening the blue of the sky.
- Protect your gear from wind-driven dust and spray near waterfalls and the Grey Glacier boat tours; a simple rain cover for your camera bag goes a long way.
- Golden hour light lasts longer than you’d think in summer given the long daylight hours, so you have more flexibility for evening shots than in most parts of the world.
Frequently Asked Questions
How many days do you really need in Torres del Paine?
For a satisfying trip that includes the major highlights, I’d say a minimum of 4 full days, with 5-7 being ideal if you want to combine driving to viewpoints with at least a couple of days of trekking on the W route.
Is Torres del Paine safe for solo travelers?
Yes, broadly speaking. The trails are well-marked, well-trafficked in high season, and the refugio/campsite system means you’re rarely truly isolated. That said, respect the weather, tell someone your planned route, and don’t underestimate the wind on exposed ridgelines.
Can you see the towers without doing a multi-day trek?
Absolutely. Several of the best viewpoints, including Mirador Cuernos and Laguna Amarga, are accessible by short walks from parking areas, and the drive itself through the park delivers spectacular views even without leaving the car.
What’s the biggest mistake first-time visitors make?
Underestimating how far in advance they need to book. Park entry tickets, refugio beds, campsites, and even rental cars in peak season need to be locked in months ahead, not weeks.
Sample Packing Checklist for a 6-Day Trip
To make this even more actionable, here’s roughly how I pack the actual bag, broken down by category, for a 6-day mixed driving-and-trekking trip like the itinerary above:
- Worn/carried daily: hardshell jacket, mid-layer fleece, moisture-wicking base layer, hiking pants, wool socks, hiking boots, sun hat, sunglasses, buff.
- In the daypack: 2L water bladder or bottles, trekking poles, first-aid kit, sunscreen, snacks (nuts, dried fruit, energy bars bought in Puerto Natales), headlamp, portable battery pack, camera, offline map/GPS device.
- In the main bag: a spare base layer, a warm hat and gloves even in summer, a lightweight down or synthetic puffy for evenings at refugios, swimwear if you fancy a (very cold) dip in one of the lakes, basic toiletries, and a printed or downloaded copy of your park entry tickets and refugio reservations, since signal to pull these up on demand isn’t guaranteed.
- Documents: passport, printed park reservation confirmations, travel insurance details, and a copy of your rental car agreement if applicable, since you may be asked for it at park checkpoints.
Final Thoughts
There’s a reason Torres del Paine shows up on basically every “best hikes in the world” list you’ll find. It’s not hype. Standing at the base of those towers, watching the wind tear across Lago Pehoé, or hearing Glacier Grey groan and crack in the distance — these are the kinds of moments that genuinely recalibrate your sense of scale. I’ve done a lot of long-term travel over the years, slept in a lot of strange and beautiful places, and this corner of Chilean Patagonia still ranks near the very top of everywhere I’ve been. Do the planning, book your logistics early, pack for the wind, and go. You won’t regret it.
n
Photo by Carter Obasohan on Unsplash.